

Summary of Blog
Installing a PM2.5 sensor isn’t just a plug-and-play job, it’s about making sure you get clean, reliable air quality data from the start. This blog walks you through everything you need to know to get it right. From picking the perfect spot (away from pollution spikes and with plenty of airflow) to mounting it at head height, every detail affects your data quality. You’ll also find a handy installation checklist, common troubleshooting tips, and pro-level advice to avoid the usual pitfalls, like humidity throwing off your readings or wiring issues causing data loss.
We’ve also broken down why each step matters, so you’re not just following instructions blindly; you understand the science behind it. Whether you’re deploying in a busy urban setting or a remote industrial site, this guide helps ensure your PM2.5 sensor does what it’s meant to do: give you meaningful, accurate air quality insights you can actually act on.
So if you care about the quality of your air data and who doesn’t?, this guide is well worth the read.
How to install a PM2.5 sensor?
Installing a PM2.5 sensor isn’t just about mounting a device. It’s about making sure your data is accurate, consistent, and meaningful. If you’re already working in the air quality space, you know how critical it is to get installation right from the start.
PM2.5 refers to fine particles less than 2.5 microns in size, small enough to enter the lungs and even the bloodstream. That’s why monitoring it properly matters, especially in areas where air quality decisions depend on reliable data.
In this blog, we’ll walk through the key steps to install a PM2.5 sensor correctly. From picking the best location, ensuring correct height and orientation, to avoiding common mistakes like placing it too close to direct pollution sources, we’ve got you covered.
Whether you’re setting it up in an industrial area, an urban site, or a remote field station, these tips will help you get clean, usable data from day one. This isn’t an intro to air quality, it’s practical, field-tested guidance for professionals who want their sensors to work as intended.
Overview of the PM2.5 sensor
A PM2.5 sensor measures fine particulate matter, particles with a diameter of 2.5 microns or less, which are small enough to reach deep into the lungs and even enter the bloodstream. These particles are often generated by vehicle emissions, industrial activities, construction dust, and biomass burning, making them a key pollutant to monitor in outdoor environments. Did you know this? Around 4.1 million premature deaths worldwide in 2019 were attributable to PM2.5.
Most modern PM2.5 sensors work on the principle of laser scattering. A laser light is directed through an air sample, and as particles scatter the light, a photodetector measures the intensity of this scatter. The data is then used to calculate particle concentration in micrograms per cubic meter (µg/m³), often in real-time.
Technically advanced sensors today come equipped with active air sampling (using a fan), environmental compensation algorithms, and digital interfaces like UART or RS485, ensuring smooth data transfer to cloud or edge systems. They’re designed to withstand extreme outdoor conditions and provide stable, long-term measurements.
In air quality monitoring systems, whether for regulatory compliance, public health, or smart city projects, PM2.5 sensors play a critical role. Their accuracy and real-time capabilities make them an essential component for capturing meaningful air quality data.
Tools and Materials Required
Integrating a PM2.5 sensor into Dustroid, Oizom’s rugged dust monitoring system, requires careful planning and the right tools to ensure seamless operation in outdoor environments. The goal is not just to fit the sensor but to ensure it delivers real-time, reliable data over long-term deployments in dusty, extreme, or industrial conditions.
Here’s a comprehensive checklist:
Core Components
- PM2.5 Sensor Module: Ensure it supports laser scattering technology, active airflow, and outputs like RS485/UART for Dustroid’s controller compatibility.
- Sensor Mounting Slot or Base Plate: Designed to hold the sensor securely inside the housing with thermal and vibration isolation.
- Dustroid Internal Controller Interface: Make sure the firmware can read, parse, and log PM2.5 data from the sensor module.
Power and Connectivity
- AC-DC Regulated Power Supply: Depending on deployment, use an industrial-grade adapter (typically 12V/24V), a long-life battery pack, or a solar panel with a charge controller, also matching sensor requirements, connected through Dustroid’s internal power rails.
- Shielded Twisted Pair Cables (Data): For RS485/UART signals; minimizes noise and supports long-range communication.
- Cable Glands & IP67-rated Connectors: Maintain ingress protection while routing cables in outdoor setups.
Mounting & Hardware
- Anti-vibration Mounts or Gaskets: Reduce mechanical interference from wind or external contact.
- Thermal Insulation Sheet: Prevents ambient heating from affecting sensor accuracy.
- M3 Screws, Plastic Spacers, and Nylon Nuts: For clean sensor assembly without electrical shorting.
- Anti-condensation Gel Pad: To prevent moisture buildup inside the enclosure.
Testing and Setup
- Multimeter & Continuity Tester: This is used to validate connections and voltages.
- Laptop with Serial Interface Tool: To test real-time output and debug sensor communication.
- Firmware/Software Interface Access: This is for logging, sensor ID registration, and calibration initiation.
Safety and Maintenance
- ESD Gloves and Ground Strap: Protect sensitive electronics during handling.
- Spare Filters or Mesh (if applicable): For keeping the sensor chamber dust-free in extreme deployments.
Choosing the Right Location for Installation
Where you place your PM2.5 sensor makes a big difference in the kind of data you get. Here are a few key things to keep in mind when choosing a site: Proper location selection is critical for optimised data collection. It varies as per the purpose of the project. According to the U.S. EPA QA handbook (Vol II, Section 6.0 Rev.1), the selection of locations should be based on monitoring purposes.
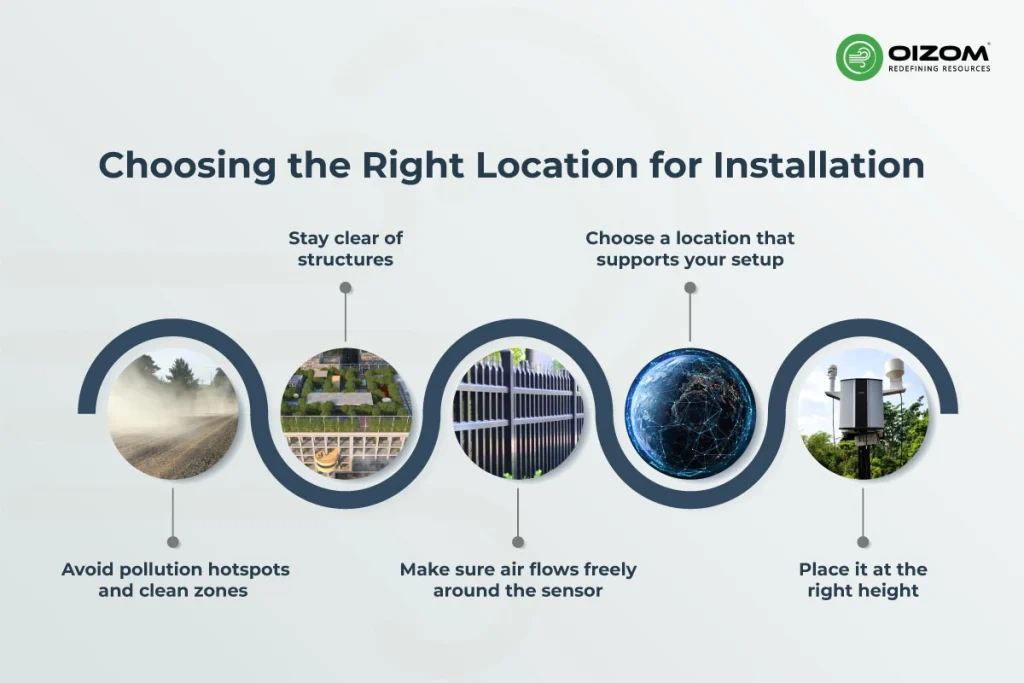
1. Avoid pollution hotspots and clean zones
Try not to place the sensor too close to local pollution sources like dusty roads, exhaust vents, smoking areas, or barbecues. These spots can cause short, high spikes in data, which may look dramatic but won’t reflect the actual air quality of the broader area. On the flip side, avoid placing the sensor in areas that naturally reduce pollution, like thick vegetation or tree canopies, as they can absorb or filter out particles.
2. Make sure air flows freely around the sensor
Sensors need clean airflow to do their job. Avoid placing them next to buildings, walls, fences, or even dense shrubs, as these can block air and lead to inaccurate readings. Always check your sensor’s manual to understand where the air enters and exits; these openings should stay completely clear.
3. Place it at the right height
To measure what people are actually breathing, install the sensor about 3 to 6 feet above the ground, around head height. A slightly elevated position helps with both data accuracy and keeping the sensor safe from water splashes or tampering.
4. Stay clear of structures
Structures like walls or rooftops can interfere with airflow or even absorb certain pollutants, which may lead to artificially low readings. Whenever possible, give your sensor some breathing room.
5. Choose a location that supports your setup
Make sure your site has what you need: power, internet (Wi-Fi or cellular), and a secure place to mount the sensor. This not only ensures smooth operation but also saves you the cost and effort of creating those connections from scratch. Also, don’t forget about your safety during installation. Pick a spot that’s easy to access without putting yourself at risk.
Configuring the PM2.5 Sensor Data
Once your PM2.5 sensor is installed, the next step is to configure the data it collects, so you’re not just receiving numbers, but usable, reliable insights.
- Start by connecting the sensor to your controller or data logger using the appropriate communication protocol, typically UART, RS485, or Modbus RTU.
- Make sure the baud rate and device address match your system’s setup. Most sensors come with a default configuration, but it’s good practice to verify and customize settings as needed.
- Use the manufacturer’s software tool or a serial monitor to view the raw data stream. Here, you can set output frequency (e.g., one reading per minute), enable or disable data filters, and check sensor status codes.
- For long-term deployments, it’s helpful to set up timestamping and data averaging (e.g., 1-min or 15-min intervals) to reduce noise and get more stable trend data. If your system supports it, enable auto-calibration or apply correction factors based on co-location with a reference monitor.
- Finally, test data flow to your dashboard or cloud platform. Ensure the readings are consistent, and alerts or thresholds are configured if you’re tracking pollution events.
- With proper configuration, your PM2.5 sensor becomes a trusted data source, not just a device.
Comparison to Regulatory Standards
To ensure our sensor data holds up to the highest standards, we set up the monitors right next to a custom-built reference station equipped with a Beta Attenuation Monitor (BAM), a U.S. EPA-designated Federal Equivalent Method (FEM) instrument. This collocation runs continuously for 72 hours, allowing us to calibrate the Dustroid against regulatory-grade data.
Even in environments with very low dust concentrations, Dustroid proves its precision. When collocated with Horiba’s FRM system, we consistently achieved a correlation (R²) greater than 0.85, highlighting the sensor’s ability to deliver accurate, reliable data across varying particulate levels.
Troubleshooting Common Issues
Not everything goes smoothly the first time, and that’s okay. What matters is knowing how to spot and fix issues before they mess up your data. Here are a few common checks you might run into:
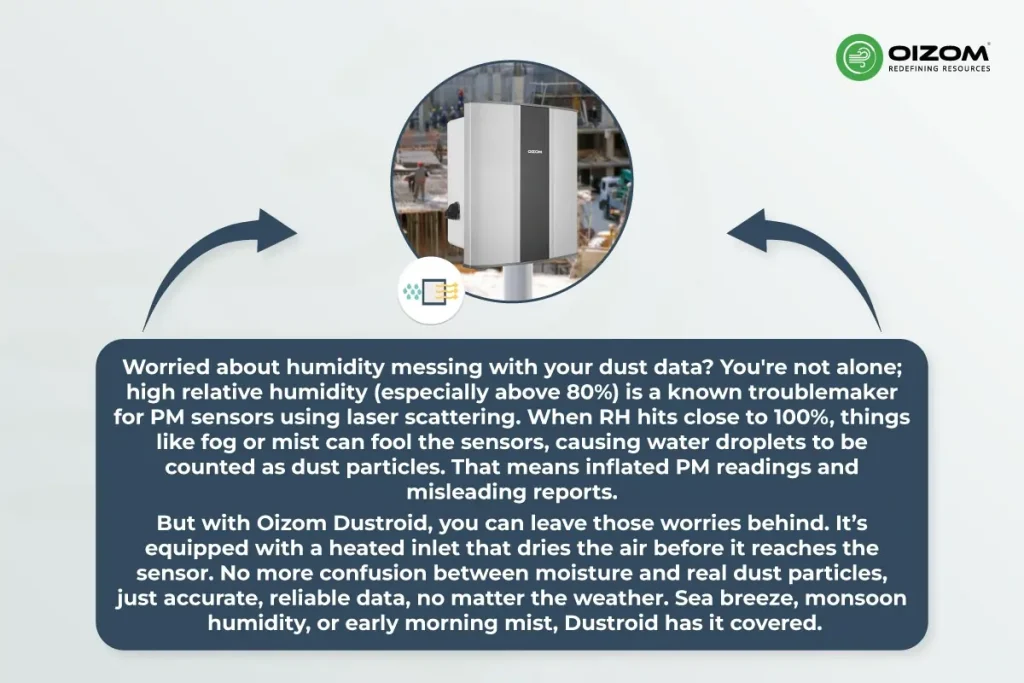
- “Why are my readings too high in the morning?” Likely due to fog or high humidity. If your sensor doesn’t have a heated inlet, it might be picking up water droplets instead of real dust.
- “The sensor shows no data at all.” Could be a loose cable, a power issue, or mismatched communication settings. Check voltage, then confirm your baud rate and wiring (especially RS485).
- “My data spikes whenever a truck passes by.” That’s not a bug, it’s placement. Try relocating the sensor away from roads, exhaust pipes, or construction dust sources.
- “Sensor worked fine, but now shows weird characters on screen.” This could be a UART/RS485 mismatch or interference in cables. Use shielded cables and check for exposed wires or grounding issues.
Maintenance of PM 2.5 Sensor
Maintaining your PM2.5 sensor is key to ensuring long-term accuracy and reliability, especially in outdoor or industrial environments where dust, humidity, and temperature shifts can impact performance.
- Start with routine inspections. Every 2–4 weeks, visually check the sensor for any physical blockages at the air inlet/outlet. Dust buildup, spider webs, or debris can restrict airflow and distort readings.
- If your sensor has a fan-based air sampling system, listen for irregular noises or reduced airflow; it might be time to clean or replace the fan. In high-dust areas, consider installing a pre-filter mesh to extend sensor life.
- Most optical sensors accumulate internal dust over time. If the manufacturer allows, schedule internal cleaning every 6–12 months. Use compressed air or a soft brush, and avoid harsh solvents.
- Check firmware logs or error flags regularly to catch early signs of drift or hardware failure. Sensors with self-diagnostic features may alert you to calibration needs or internal errors, highlighting the importance of accurate air quality sensor calibration for reliable data.
- Don’t forget to recalibrate or validate the sensor annually by co-locating it with a reference monitor. This helps adjust for any long-term deviation.
- Finally, ensure the power supply and communication cables are weather-protected and securely connected to avoid downtime.
- Consistent maintenance doesn’t just extend sensor life, but it also keeps your air quality data trustworthy.
Conclusion
Installing a PM2.5 sensor is more than a setup task. It’s a critical step toward capturing accurate, real-time air quality data. From selecting the right location and ensuring proper airflow to configuring power, communication, and calibration settings, each element influences the reliability of your measurements.
At Oizom, we’ve seen how the proper installation can deliver real impact. Take our project with BHP Spence in Chile, for example. By deploying our Dustroid and Pollusense devices with properly installed PM sensors, they were able to monitor dust levels in real-time and optimize their suppression systems, leading to improved operational efficiency and regulatory compliance. Read the full case study.
A technically sound installation not only improves data quality but also reduces maintenance issues and sensor drift over time. As sensor technologies advance, features like remote diagnostics, cloud integration, and AI-based analytics are becoming standard. Designing your setup with these future-ready capabilities in mind will save time and resources down the line.
Whether you’re monitoring for compliance, public health, or research, the quality of your data starts with how well your sensor is installed and configured. Done right, your PM2.5 sensor becomes a reliable part of a smarter, cleaner environmental monitoring system powered by Sensor Based Air Quality Monitors.
With growing air pollution concerns worldwide, investing time in a proper installation today helps lay the foundation for healthier communities tomorrow. Have questions or need help setting up? Contact our air quality experts today, We’re here to support you at every step.